PAGE 60 – April 2007
H O T I D E A S F O R S M A L L R A I L R O A D S

This month we’re addressing one of the key Hot Topics for 2007: Layout Lighting.
Here are a cornucopia of lighting ideas we’ve received from readers, dealing with
lighting basics ranging from very small to fairly complex (but still “small”) layouts!
We’ll continue with more advanced lighting ideas in a later issue.
WHY DO YOU NEED LIGHTING FOR YOUR SMALL LAYOUT?
What’s the big deal about lighting? What does it do for your layout? Is it worth all the trouble and expense?
The answer: making your own custom lighting rig for your layout, no matter how small, is the only way to be sure that your modeling is displayed at its best. After all, when someone looks at your layout, everything they see is just reflected light! It makes sense to control what they see.
To check out the effects of various types of illumination, let’s look at a layout under several different lights. For this demonstration I’m using a little 9in (22cm) pizza that I made in Gnine scale. The little layout is shown at the right in normal room light … it’s quite dark and has no particular emphasis; details are hard to see.
Now let’s look at the same layout under several lights. These photos were all taken from the same position, by the same camera. They were not edited in any way, except to reduce their size to fit on this page. Although Internet photos are of relatively low quality, I hope you can see some distinctive differences among these commonly used light sources.
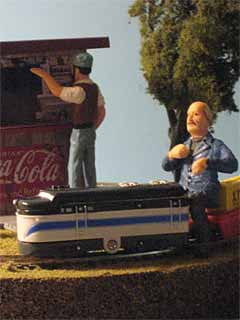
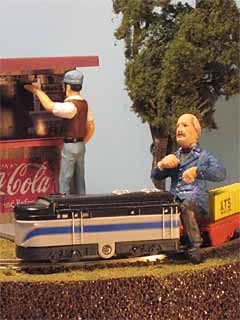 Incandescent Lamp | 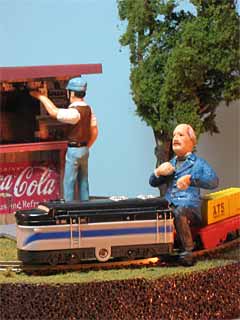 Daylight Fluorescent Lamp | 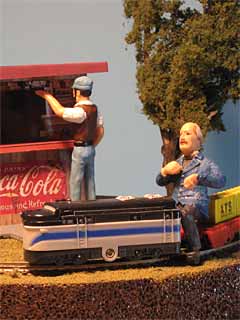 Halogen Desk Lamp |
I think we’d all agree that any of these three choices is an improvement over no light at all! The differences among them are easy to see. The incandescent light provides an overall, unaccented illumination, on the warm side, rather like a slightly overcast day. Daylight fluorescent lamps give a clear, cool light — and because they approximate daylight, they give the truest color rendition and show modeling details most clearly. Halogen lights are also clear, but much warmer — they provide a pleasant, sunny glow, and they tend to “mold” 3-D objects (like figures) by creating realistic shadows.
Photo by Steve Bennett
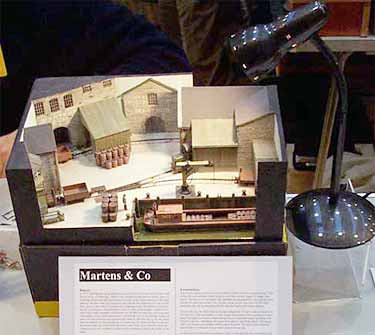
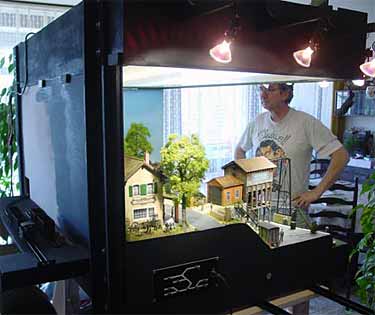
So if you only have room for one source of illumination, your best bet is a daylight fluorescent. Many small layouts use a “light rig” that consists simply of a lamp with a long neck that can shine over the layout. At right is a good example, Chris Krupa’s wonderful Martens & Co. shoebox layout. It’s shown on exhibit at ExpoNG a couple years back. This is a very effective way to present your well-modelled small layout.
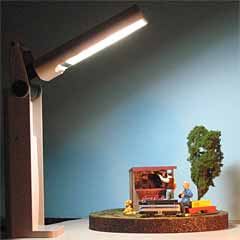
Similarly, the daylight fluorescent photo above was taken with a desktop Ott Light, one of several good brands of such lamps (shown at left). One important note: for best results keep the light higher than the layout and to one side. This will create the impression of sunlight and will also provide interesting shadows on the layout. Note how the shadows cast on Martens & Co. create interesting shapes and patterns that enhance the layout’s effectiveness. A little experimenting will show you which side works best for your layout and what angle creates the best-looking shadows.
For photography, you will also want to add a second light, at a lower elevation, to show off the sides and shadowed details of your models. This is called a “fill” light (it “fills in” the shadows to reveal important details). All three of the examples above used a fill light shining softly from the lower right. You don’t need this light when viewing the layout in person, but it is very helpful for photographing model details.
DAYLIGHT FLUORESCENTS BOOST A PRIZE WINNER
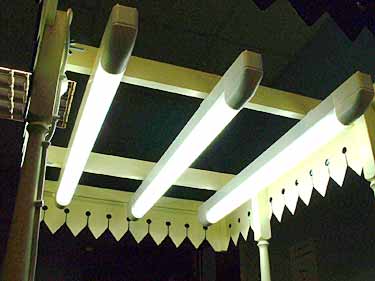
Somewhat larger — but at 30x20in still in the “small layout” category — is Newton Halt, the winner in the Narrow Gauge Competition at the 2005 Chelmsford (England) Model Railway Exhibition. Andy McMahon and Sheila Perry used three daylight fluorescent tubes, mounted directly over the layout, to provide bright, excellent lighting for their award-winner.
They used three two-foot (60cm) fluorescent fixtures with daylight tubes. According to Sheila, “The fixtures without the choke starters were substantially lighter though a little more expensive.” They constructed a sturdy but lightweight awning frame to hold the lights in place. To save weight, the fixtures were used as horizontal braces.
The canopy was cut out in the shape of a typical British railway station awning and painted a light-reflecting color inside. The drawing (above right) shows how the whole thing goes together. “Visually the daylight aura reduces shadowing,” reports Andy, “and photography can be carried out without flash. Colours are shown as they should be, and detail hunters can loiter without straining their eyes. Visitors to our layout can easily find us in crowded exhibitions by looking for the deep blue awning with daylight streaming through the zig zag edging.”
COMBO — FLUORESCENT+HALOGEN — WORKS GREAT IN OZ
“Prof Klyzlr,” the pseudonymous but well-known Australian modeler who lives in Sydney, has become known as something of an expert in layout lighting. He shared some of his knowledge with me in a communique recently.
“I have been doing a fair bit of research over the last few years into lightweight lighting for show displays,” the Prof began. “12V AC halogens in gimbal mounts have now become my favourite solution, especially as they are now available at much cheaper cost.” An example of how Prof K uses these halogen lights on his current personal layout (along with some tips on how to use them) was shown in Scrapbook #58.
But for many layouts, the Prof recommends a combination of daylight fluorescents for clear, over-all lighting, with halogen spots to accent particular interest areas with warmer light. He cited, as an example, a large O scale modular layout for which he recently designed a modular lighting rig.
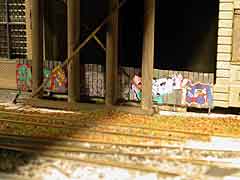
Each of the six-foot modules mounts five 12V AC 20W halogens, and two “mini batten” fluorescents with translucent light diffusers. In the left photo (above) the lighting rig arrangement is shown with just the halogen lights illuminated. The right-hand photo shows how the module appears in a dimly-lighted room with only halogen lamps. As you can see, they tend to focus directly on the trackage, not the scenery nor the backdrop.
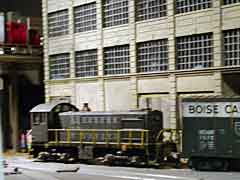
The left-hand photo (above) shows the module’s appearance with both the daylight fluorescents and the halogens illuminated. A bright, even light is provided by the diffused fluorescents, with the halogens focusing on the track and trains running through. The right-hand photo shows what this level of illumination looks like at track level … notice how crystal clear the details appear on the locomotive—and how the loco seems to be spotlighted from above, the result of the carefully aimed halogens!
For more about using the combination of halogens with diffused daylight fluorescents, read on.
PUTTING IT ALL TOGETHER IN SWITZERLAND
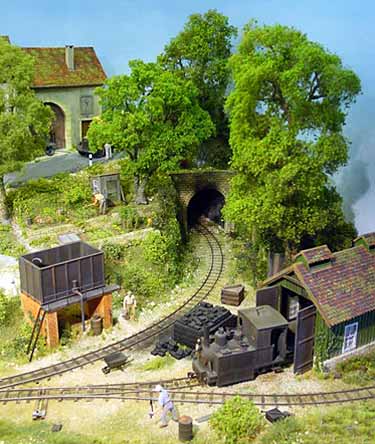
Gilbert Gribi is a well-known narrow gauge modeler who lives near Lausanne in Switzerland. He built a 135x85cm (53x33in) O-14/On2 layout, La Vernarède, with his son, Michel. This remarkable layout illustrates many inspiring railway modeling methods, including an ingenious and very effective lighting system.
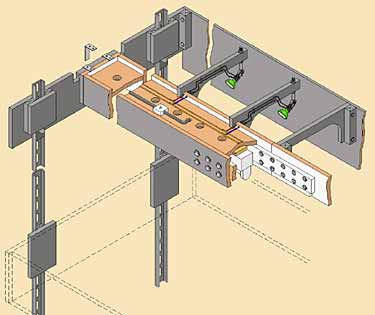
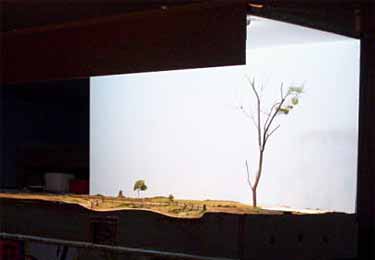
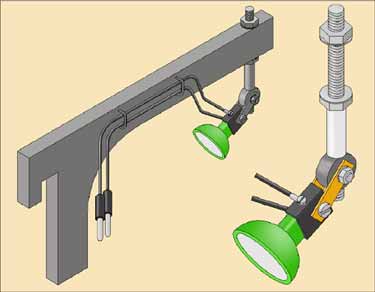
The lighting “rig” is shown at the upper left. The lights are contained in a hollow box, which holds the two daylight fluorescent tubes (only one tube is shown here). Outrigger supports hold the halogen spots, which actually are mounted beyond the boundaries of the layout baseboards (details at left below). The lighting box is floored with a prismatic Plexiglas screen that becomes the ceiling of the layout. The plexi dramatically improves light diffusion.
Why the combination of light sources? Gilbert explains, “Light from fluorescents alone is pallid (flat and dull). Only halogen lamps give the impression of sunlight. I put the halogen spots beyond the diorama (about 20cm/8in) to incline the light rays like the sun at the beginning of the day. The warm, angled light also provides nice shadows, and the spotlights can be targeted at specific objects.”
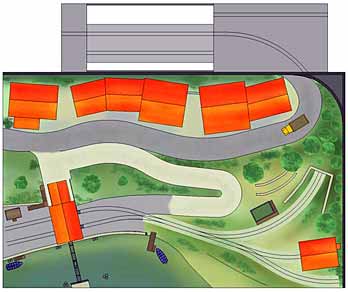
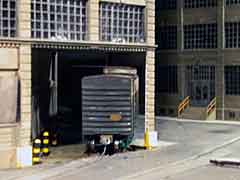
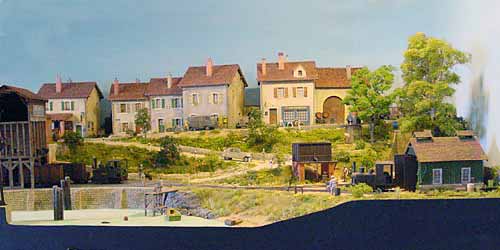
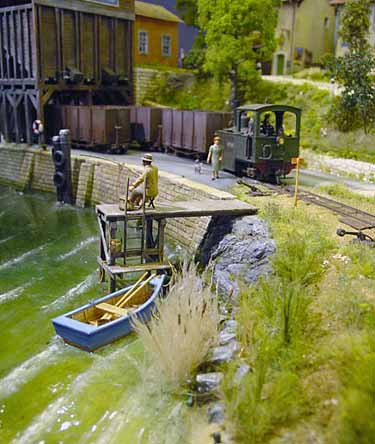
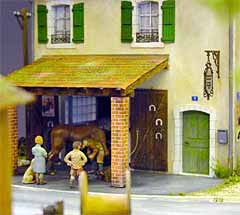
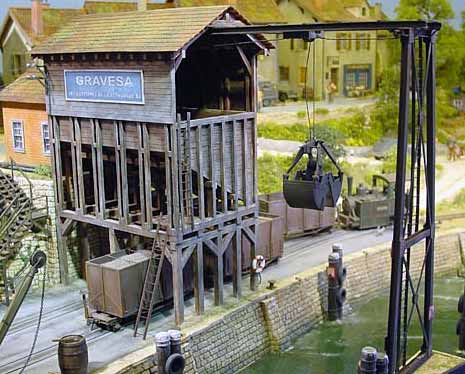
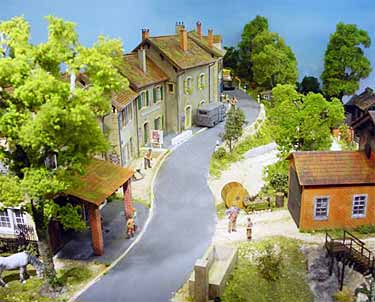
The actual village of La Vernarède in southern France, on which the layout is based, lies at the end of a very old railway used for transporting coal from the local mines. Gilbert wanted to build a small layout that featured a main street similar to the village. Highlight of the railway is a sand transfer facility, where barges are unloaded by a clamshell-bucket crane, and the sand is stored in a tipple structure then loaded by gravity into specially constructed hopper cars. The prototype is on the shores of Lake Walenstadt in Switzerland.
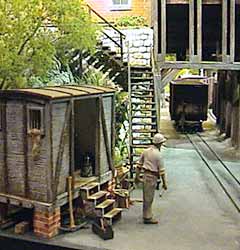
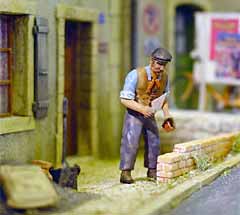
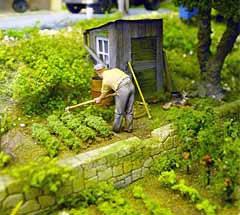
Track gauge is 14mm, representing 60cm (2ft) prototype gauge in O (7mm) scale. Gilbert and Michel designed many delightful surprises into the layout, including three levels—the lake, the railway, and the main street—along with perspective and altitude effects, layout features peeking out from behind stands of trees, and a multitude of small details, many of which must be searched out by the viewer. Rather than take the space to describe them in detail, we’ll devote the remainder of this edition to showing you a photo album from this delightful (and very well lit) layout. Bon voyage!
For more photographs of this layout, see Gilbert’s website.
Leave a Reply