PAGE 45a – JANUARY 2006
UNUSUAL & USEFUL
IDEAS FOR SMALL LAYOUTS
This is another new theme for the Small Layout Scrapbook.
We often receive ideas, designs, and photos that have quite
unusual or even unique applications for small layouts. When
we have enough, we’ll publish ’em. Here’s our first collection.
FIDDLING AROUND IN THE CLAY WORKS

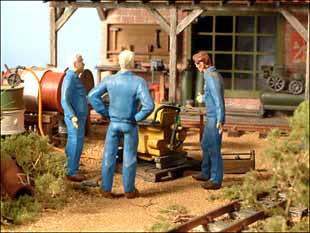
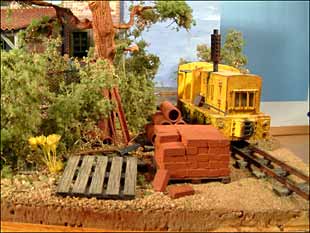
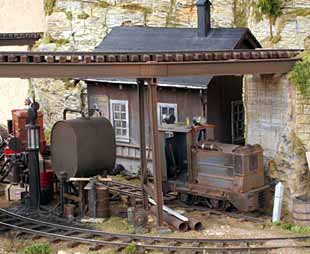
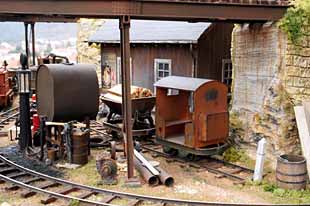
Nelson Almeida, from S. João do Campo, Portugal, made the normally-hidden fiddle yard — a turntable — the center of his On18/O9 clay operations. He named this 30x30cm layout Carl’s Clay Works, an honor we appreciate! Nelson has compressed a whole industrial operation into one square foot. Raw clay comes in from the pits on the second-from-left track (at right) and is delivered to the works on the right-hand spur. Finished product is loaded there and delivered to the loading area (left spur) where final product is loaded into trucks. Fourth track is a repair track. | 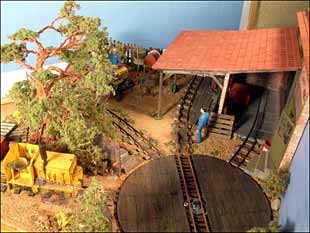 |
HERE ARE SOME MORE FIDDLE YARD TIPS
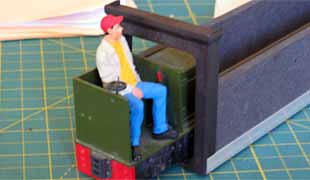
In my Peek’s Pike On30 layout, I introduced the idea of using a Peco Loco Lift* as a movable cassette to shift trains and cars around the fiddle yard. The Lift provides an easily manipulated carrier and was originally designed for OO and HO scale use. Small On30 narrow-gauge trains will fit, if you choose your rolling stock carefully. But larger scales using HO gauge, like Gn15 (left photo above), will not fit!
Ian Holmes, from Princeton Minnesota USA, has solved that problem neatly(at right). Notes Ian, “I just raised the height of the arch 30mm to clear my tallest stock by cutting the arch and inserting some 57mm lengths of 3.5mm square styrene. That length means they don’t obstruct the foam sides that protect the stock.” For more on Ian’s Purespring Watercress layout, see his website.* Although I independently developed the idea of using a Loco Lift as a cassette, I’ve since been informed that I was preceded by at least one British modeler, Paul Lunn, in a book called “Model Railway Planning and Design Handbook”, published by Santona Publications in 2004.
AND STILL MORE FIDDLE YARD TIPS!
A continuing question in fiddle-yard construction is “How do you index the sector plates and transfer tables to stop at the right place every time?” There are lots of answers, but here are two particularly useful ones.
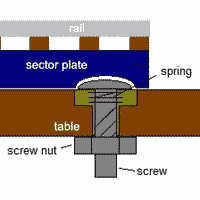
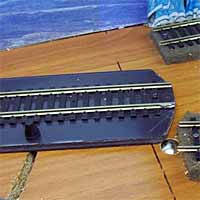
Marcelo Szkatulak, who lives in Toledo, Spain, has developed a clever system for indexing the sector plate (pictured above) on his Patagonia Yard layout. Marcelo uses a bicycle brake cable to move the plate from behind the scenes, and he describes his indexing this way: “I made a hole with two diameters. The big one receives a spring that presses against the back of a screw head. The screw threads under the table are used to regulate the height. I made a cavity in the bottom of the sector plate, so the screw’s head would fit… When I move the cable and the sector table catches the index, you can hear a smooth “click” and the rails are aligned for the locomotives and wagons. The heavier the locomotive or car, better is the precision.” The photos and diagram below show Marcelo’s installation.
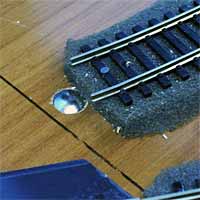
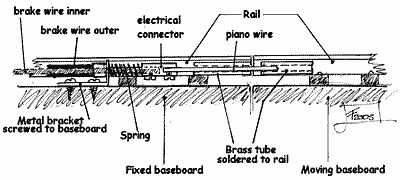 Another “hands off” method for aligning sector plates (and transfer tables) was suggested by Jack Trollope, from the Highlands of Scotland. Jack’s drawing (at left) pretty well sums up the idea. A small brass tube is soldered to the outside of one rail on the sector plate (at the right). A bicycle brake line is attached (using an electrical connector) to a length of piano wire alongside the matching rail on the layout table. Pushing and pulling the cable allows the operator to move the piano wire in and out of the tube, precisely aligning the two tracks. In this system, the weight of the rolling stock does not influence precision of alignment.
FOLDING LAYOUTS REDUCE SPACE REQUIREMENTS
Frequent contributor Alexander Lehmann, from Mannheim, Germany, is building this HO micro layout called Rainer’s Quay. It’s a waterfront scene with a narrow-gauge railway serving both the ships and the warehouses on the docks. The scene is heavily influenced by Alex’s visits to Amsterdam.
 He describes the layout’s construction this way: “It’s a horizontal folding layout with a vertical hinge right in the middle. The baseboard is 72×12.5cm (28x5in), enough space for three parallel tracks in TT-gauge or two in H0. The switches are positioned completely on either one or the other of the halves.” So the layout folds up into a 14x5in bundle that you can carry under your arm!
The sector table, hidden inside the central warehouse building, is pivoted roughly in the center. It moves from track to track, but does not turn a full circle as a turntable would. The sector table is long enough to hold a short switching loco and one car. It connects the two trackage segments, making it possible to shunt/switch the entire quay. The buildings are open at the back for “fiddling.”
I hope to show more of tiny Rainer’s Quay as construction progresses. The layout is dedicated to Alex’s father, who is the origin of its name.
COMPUTER CONTROL FOR SMALL LAYOUTS
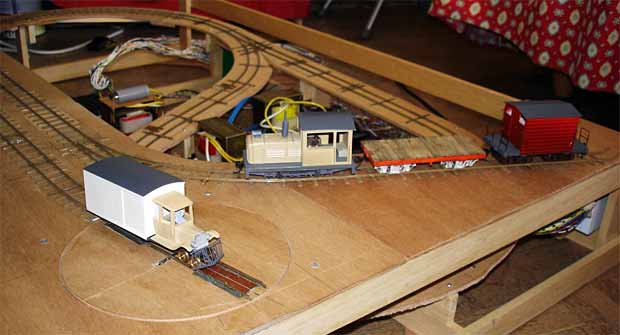
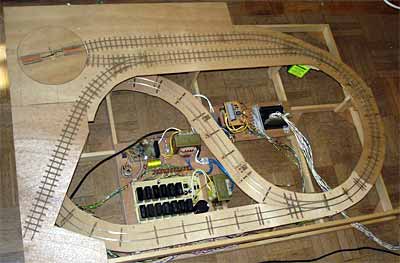 Roger Humbert, of Nice, France, is building a layout that’s unusual in several ways. He’s building it in Sn3 scale, which is even rarer in Europe than it is in the U.S.; and he’s using an “out and home” track plan, which is seldom seen in very small layouts. And to top it off, the operation is fully automated and computer controlled!
The layout measures 3x2ft (90x60cm). Rail is code 70, 8-inch radius and a steep 7 percent grade.
According to Roger, the automatic operation works this way: “At the start of the cycle the train is on the spur, and the railcar on the rear passing-siding track, facing the turntable. The train starts, runs downhill, enters the return loop (which will eventually be hidden under a mountain) and stops before exiting the loop. Then the railcar gets a spin on the turntable (counterclockwise) and also runs to the loop, stopping behind the train. The turnout is changed and the train runs uphill, returning to stop on the passing track closer to the center of the layout. There, a magnet uncouples the cars and the loco goes to the turntable for a clockwise spin, runs around the cars and backs them up on the spur. Meanwhile, the railcar has exited the loop and returns to its original spot. End of cycle which lasts around four minutes.”
Roger’s computer-controlled system is a simplified version of Bruce Chubb’s design, described in a series of articles in the Model Railroader, for interfacing the computer and the railroad. Roger made his own electronic cards which are now installed inside an old IBM PC. He reports, “For the automatic part, I rely on reed switches activated by a magnet under the loco or the railcar; the computer senses whether the reed is on or off… This is more a process control system than a computer per se, which is just fine with me because the instructions are then easy and writing the program is quite simple (I use Quick-Basic language).”
Roger’s example is inspiring. I’d also like to hear from any other folks who have applied computer controls to small layouts.
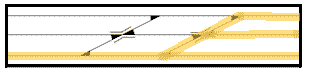
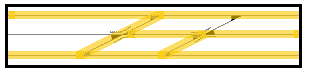
THE RETURN OF THE PUZZLE LAYOUT!
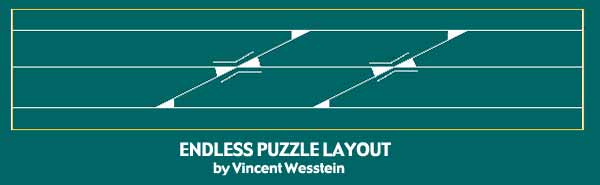
that it’s not the cheapest layout because of the doubleslips.”
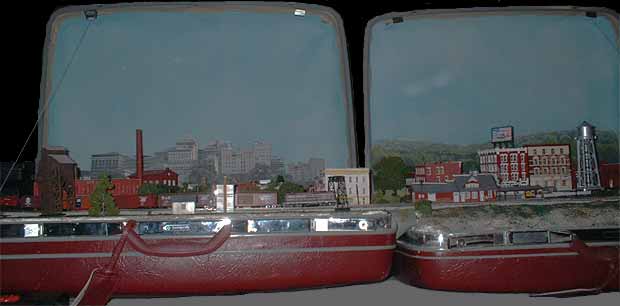
TWO CONTAINERS MAY BE BETTER THAN ONE
TOY TRAINS CAN PROVIDE SMALL LAYOUT FUN
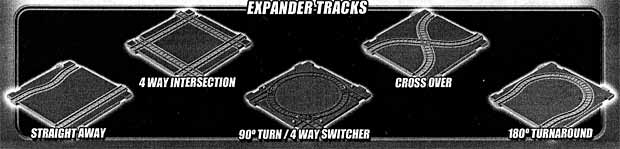
Bruce Dombey, from Portage Indiana USA, converted a kids’ toy railroad set into a delightful little operating layout. Here’s how he did it, in his own words.“At the end of July 2005 I found myself registered for the 25th Narrow Gauge Convention but having built nothing to take. That’s like going ot a potluck dinner without a dish! As luck would have it, while browsing my way out of a local craft store I happened upon a toy train called XTS Train System. A small battery powered engine ran on various 6in square snap-together track panels (see below). I chose two 180º turnarounds and a crossover to form a figure-8 track plan.”
The gauge appeared to be about 11/32in, so Bruce decided to call it On16. “Over the battery powered chassis I scratchbuilt a small 0-4-0 critter. I mounted the track panels to a piece of foam board and surrounded the panels with a couple of inches of 3/16in balsa. Then with a saw cut it to the final shape, overall baseboard size is 8-1/2x19in.
“To disguise the figure-8 I scratchbuilt a small foundry building (about 7-1/2in square) with a lean-to on one end and a canopy on the other. I finished and detailed the interior, added a storage tank and men’s room to one end. General clutter and ground foam completed the little layout. To my amazement it ran flawlessly for three days … on the original battery!”
Here are the track panels currently available for XTS Train Systems. If you make something from this idea, please take pictures and let me know!
On the subject of mass-produced trains, I’m often asked whether it’s possible to build micro layouts using O scale three-rail equipment or S scale American Flyer style trains. The answer is an emphatic YES! I’m interested in hearing your ideas for using high-rail or tinplate equipment on very small layouts.
To start the ball rolling, here are two of my designs that actually fit on 48x12in (120x30cm) shelves. They’re both versions of the classic shoebox design, Carl’s Imports, found elsewhere on this site.
[Ed. note: Several readers have suggested K-Line four-wheeled O-gauge Porter steam and Plymouth diesel switching locos with couplers at both ends. They’re listed on the company’s website.]
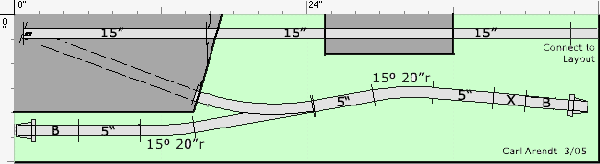
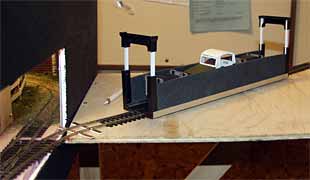
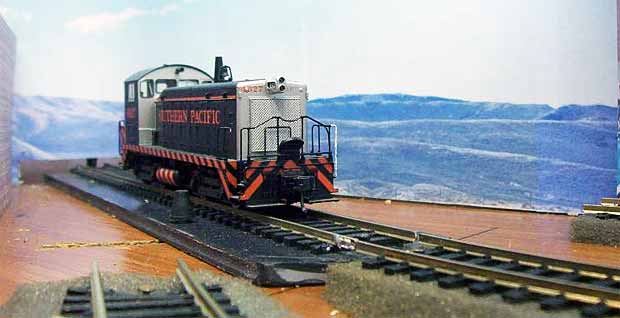
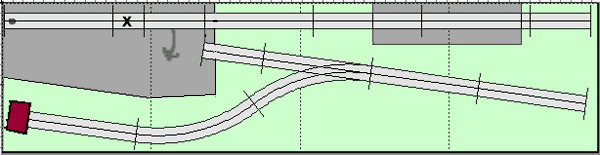
An S-gauge version might look like this one, designed for S-Trax trackage (or for American Flyer, which has the same geometry). The 15in (38cm) sector plate should hold one of the small SW-series diesel switchers now available, plus one 40ft car. Operation is as described for Carl’s Imports. This particular layout was designed to hook onto a larger S-gauge pike, connecting at the upper right corner.
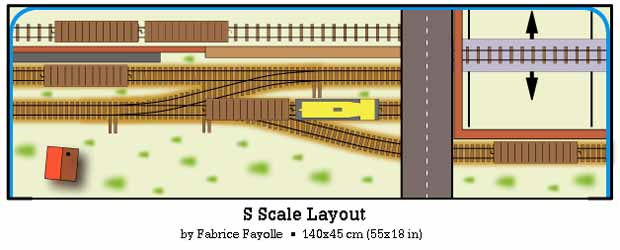
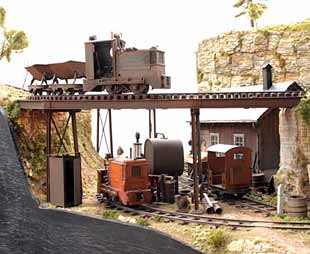
A CLASSIC SMALL LAYOUT FROM A SWISS MAESTRO
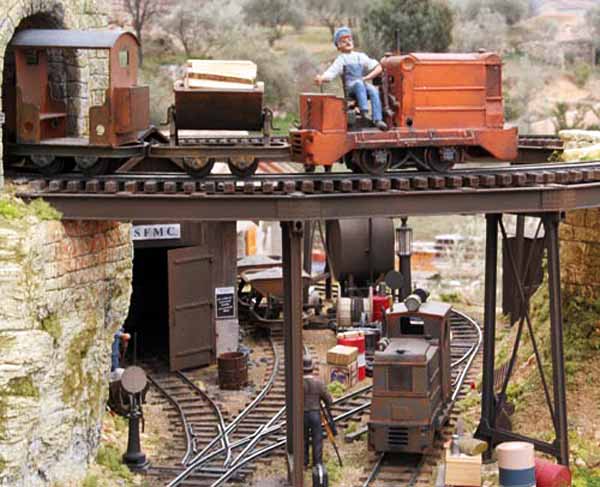
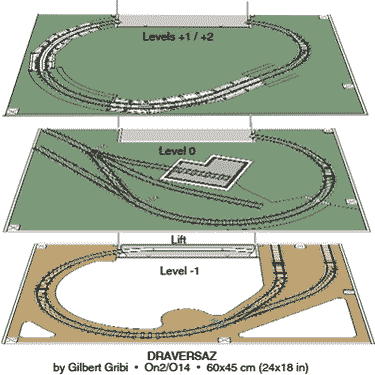
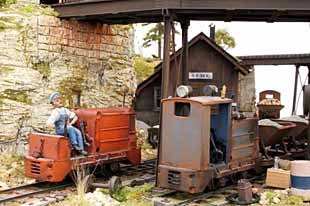
 Well-known European modeler Gilbert Gribi, who lives near Lausanne in Switzerland, sent me these photos and plan of his classic micro layout, Draversaz. It was built in the mid-1990s, and may still represent an “ultimate” in shoehorning plenty of operation into a very small space!
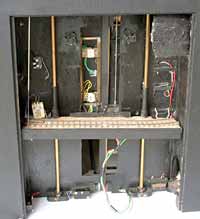
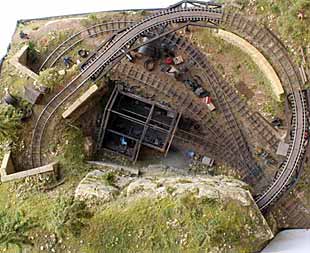
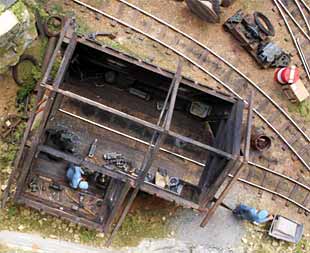
The layout is built on four levels in On2/Oe14 scale (7mm to the foot on 14mm gauge) and measures 60x45cm (24x18in). Heart of the layout is the concealed lift/elevator (above left) that cannects all four levels — from the hidden fiddle yard at Level -1, up to the top two levels that provide access to an offstage dam under construction, served by the rising track loop. The elevator slides up and down on two rods and is driven by a toothed belt mechanism from an old Olivetti printer. It is “called” by micro-reed sensors hidden in the ballast at each level. Several security interlocks prevent the locomotives from running into an empty shaft.
But even more impressive is the scenic work — Gilbert’s specialty. The photos below speak for themselves. To see more of Gilbert’s work, visit his website. In addition you can find a detailed description of Draversaz in the French modeling magazine, Voie Libre, issue #3 (April 1998).
Leave a Reply